How to Move a Sprinkler System Line
Landscaping enthusiasts are constantly improving and upgrading their lawn, shrubs, and flowers. In some cases, those improvements necessitate relocating sprinkler lines to provide adequate hydration for thirsty plants.
At Andy’s Sprinkler, Drainage, and Lighting, we understand that considerable planning and labor goes into reconfiguring a sprinkler system and relocating lines. Fortunately, our expert team can take care of the job for you! Curious how the process works? Below, we’ve outlined how to reroute an existing sprinkler line so you know how our team conducts the procedure.
1. Plan the New Sprinkler Line Layout
Before we can move the line, we must plan out the new sprinkler line layout according to your landscaping needs. First, we analyze your landscaping to determine where to place the new line so your foliage receives adequate hydration.
2. Locate the Origin of the Line
To move a sprinkler system line, we must first locate its origin. Within your sprinkler system, there are a set of valves that controls each sprinkler line. Those valves are typically housed in a plastic box below ground, typically identified by a round green plastic top. We trace the existing line to its origin at the valve and cut it at the point of attachment.
3. Dig a Trench to Excavate the Line
After cutting the valve, we start digging. First, we dig a trench along the top side of the pipe. To ensure we don’t damage the line, we first perform a shallow soil excavation just shy of the pipe and then gently scrape the remaining soil away until the line is visible. We also take special precautions when digging around each sprinkler head and riser to ensure each component remains fully intact throughout the excavation process.
As we dig, we keep an eye out for pipes that branch away from the line we’re excavating. Since we’ll be removing that line, we’ll also need to excavate any branching supply lines where they attach to the line we’re working on.
4. Remove the Pipe and Sprinklers
If we’re reusing the entirety of the line and the sprinkler heads, we then carefully remove each component from within the trench and set them aside. If we only need to use certain portions of the pipe, we’ll cut it according to the specifications we determined during our initial planning phase. After removing the line and all sprinkler components from the trench, we refill it with soil.
5. Lay Out Pipe and Mark the New Line
Next, we lay out the pipe and mark the new line with flags in the location we plotted during the planning phase. But before we can start digging the trench for the new line’s location, we must contact your local utility service to determine whether there are any existing service lines in the way.
If there are any marked lines that interfere, we’ll need to replan the sprinkler line layout to accommodate the service lines. Finally, when we get the go-ahead from the utility service, we’ll start digging the trench for the new sprinkler line.
6. Dig the New Trench and Insert Pipes
Before we begin the digging process, we move the pipe and sprinkler heads out of the way. Since the line is already marked with flags, we simply follow the markings to dig the new trench.
We then calibrate the depth of the new trench to ensure your sprinkler heads are at the appropriate height and dig the trench below the frost line for your yard. After we finish excavating the area for the reconfigured sprinkler line, we then lay the pipe in its new trench and connect it to the water source.
7. Remove Sprinkler Heads and Flush Pipes
Soil often ends up inside sprinkler pipes during excavation, so we must ensure the pipe is free of all debris before we attach the sprinkler heads and replace the soil over top of the pipe. To do this, we perform a simple water flush, which involves removing the sprinkler heads and turning on the water source. After flushing the pipes, we replace the sprinkler heads and turn on the water to check for any leaks. If we observe any leaking, we’ll perform repairs at this point.
8. Replace Soil and Test the Pipes
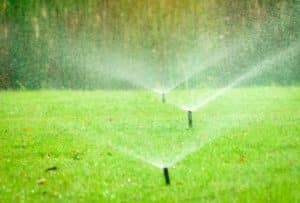
Finally, we cover the pipes with soil, making sure to keep the sprinkler heads positioned vertically as we secure them in place with soil. We then turn on the water to check each sprinkler head’s orientation and make any necessary adjustments to their positioning. That’s it! Once we complete the process of orienting the sprinkler heads, your new sprinkler line is ready for use.If you’re updating your landscaping and need to reconfigure your sprinkler system, get in touch with our team at Andy’s Sprinkler, Drainage, and Lighting. We specialize in sprinkler system reroutes, checkups, repairs, and a wide variety of drainage and outdoor lighting solutions. When you need experienced professionals you can trust to take care of all your sprinkler system needs, we’re the team to call! To learn more about our services, request a quote, or schedule a service appointment, feel free to contact our team today.